Friday 30 January 2015

Happy heart month!

I love decorating for Valentine's day. Seeing hearts all over our living and dining room make the spaces even more filled with love!

I like to keep things pretty simple. I have my staples that I always put up and then I usually add one or two new DIY decorations. 


This decoration was super easy. I removed the glass from a picture frame that I am not using at the moment, along with some twine and scrap booking paper. I think that it took me about 10min to make, and look how cute it is!


The heart garland is from the dollar store and the LOVE sign was made from scrap felt, glitter tape (from the dollar store) and a piece of card stock.


I am loving the teepee even more now after having the light bulb moment to include it in the decorations. I hung a dollar store decoration off of the top posts. Max's play space needs to be festive too right!? ;)


I always include coloured paper straws in my holiday decor. We drink lots of smoothies so having these out on the table is handy. My mom's friend is a talented quilter. She recently made her a table runner for every holiday! My mom let me borrow this gorgeous runner for the month.

 
This is probably my favourite part of my Valentine's Day decor.  All it took was grey yarn, and pink and red felt!


Chalkboards are another staple of my holiday decor. I like having a few chalkboards because I can decorate them differently each year as my tastes change.
 

 Two words... buttons / canvas. BOOM. Cost $2. I have this sitting on an easel, on the ledge just inside our front door to greet visitors.


Highlighting our wedding picture, a heart garland and cinnamon hearts. yum, yum, yum!


Last year I purchased this printable and put it in one of the frames I had lying around. I have included the link!
https://www.etsy.com/listing/175912915/i-mustache-you-to-be-my-valentine?ref=shop_home_active_13
 

At risk of sounding about 40 years older, I love festive dishtowels. There I said it. I may or may not have a tupperware container full of them, and I may or may not have made it my mission on our out-East trip two years ago to find one as a souvenir. (It has a lobster on it.. hehe).


I don't have too many activities planned for V day. I bought Max a package of robot valentines for his daycare friends (Valentine, I'm nuts and bolts about you), and I love this idea of heart shaped fruit kabobs. I am going to wait until next year to make Max a felt envelope to hold his Valentines.

This month will be a busy one for sure. I head back to work full-time on Monday. Max has been enjoying daycare which is a huge relief, and I will be counting down the days to family day. My better half works a 12 hr that day but Max and I are going to visit the local pool for a swim. We have two birthdays to celebrate this month and I will be preparing for my hub's 30th poker party that is happening in early March.. a small gathering of his poker buddies! On a very exciting note, we are also starting basement renos in the next couple of weeks. Max will have his very own playroom and mommy will have.... wait for it... her very own finished laundry room!!! Eeks.. I can't wait to put my Pinterest "laundry room" board to use!! Oh the possibilities!! :)

Happy early Valentine's Day lovers!!!!

~ K

Sunday 18 January 2015

My happy place

When I was little I loved to make crafts. Homemade cards, picture frames, iron on plastic beads, you name it. Every so often my mom would have to purchase a new, larger plastic tote just to house all of the materials I had gathered. I would be in my room for hours creating.

During my teenage and early adult years I did little crafting. I suppose I was preoccupied with other activities. Looking back I think that I lacked creative juices as well. Enter Pinterest. Since discovering this website I feel as though I am returning to my childhood. The joy of creating has returned to my life, and I have had so much fun over the past few years, gaining inspiration and ideas from fellow crafters.

After picking my hobby back up, I needed a space in our home to store the materials that I was quickly acquiring. When we had moved in to our home, the previous owner had left a peg board in the basement. I painted it a bright teal and bought a package of hangers from Home Depot. There were lots of different variations of hangers included in the kit. I cut a piece of doweling to serve as a ribbon holder, and I used three large soup cans covered in scrap booking paper to store pens, markers, paint brushes, and glue sticks.
I used to keep gift bags in an under-the-bed tote, but I always was forgetting what I had and then would end up buying more. So my solution was to organize the bags in canvas totes by size and holiday. I find this to be much more functional. Other items on the board are those items I use too frequently to have them stored away; scissors, glue sticks, stamp pads, etc. I feel as though this picture does not do it justice. It appears to be a little chaotic but I promise it looks tidier in person :)

I keep all of my thank you cards and random envelopes in a galvanized bucket (far left) on top of my scrap booking paper/felt tote. I always keep my scraps no matter how small for future projects. I have two storage totes, one small desk top one that houses my stamps, and the other larger tote that stores the majority of my crafting materials.

Along the left side of my crafting desk I have mini mason jars full of buttons, assorted by colour. 
Besides my spool of ribbons, I would have to say this is my favourite part of this space.


I covered a bulletin board in fabric and secured it with hot glue. I also secured a few pieces of ribbon along the bottom sides so I could store various odds n' ends. On this board I keep stickers, stencils, and left overs from previous events. I also have keepsakes on the board and remind me of happy times. 


This week Max has needle 2/3 of his one year immunizations, and he will be going to daycare for a half day and then full day. Last week at daycare he took a nap mid morning in the playpen right in the play room. I could not believe it!! He would never sleep in noise like that at home!! Bananas!! Oh, and then on Friday he grabbed the carbon monoxide detector at the children's library and set it off. Needless to say we were the loudest in the library. If he keeps this up at story time, Max may go down in history as being the youngest kid to be banned from the library ;) 


This Thursday I will get to take him to the gross motor drop in one last time. It is my favourite place to take him :)

I hope everyone has a super week!!
Thanks for stopping by :)

~ K

Monday 12 January 2015

Goodbye maternity leave (insert tears)

What I hoped my last month of maternity leave with Max would look like, and what it looks like in reality are two very different things. While I would love to spend my last weeks at home with Max attending drop in centers and play dates, and having lunch dates with friends, in reality this month is really a preparation month for our family.

I am already at work two days a week. Since September I have been completing an education placement at my work for the degree I am working on. This has been really good for our family. Max has been slowly getting used to me not being with him 24/7, and he has been able to spend some quality time with daddy, without me being there too. It has also given my husband perspective on what it is like staying at home with a babe all day. He has been able to learn that it is not always sunshine and rainbows. What it is like when your little one decides to only nap for a half hour in the morning, and forgo their afternoon nap, and how it feels to be constantly "on," supervising every move your toddling baby makes. It has been good for me too. I think it would have been way to difficult for me to return to work full time after being at home seven days a week with Max. I would seriously go through withdrawal. I have learned over the past four months that he is okay when I am not there, and while others do things differently then I do, at the end of the day Max is loved, safe, fed and well cared for. That's all that matters :) Oh, and I have also used my lunch hours to whip around doing all of the errands that are easier to complete sans baby. That aspect has been wonderful!

Two other days of the week for the month of January, Max transitions to daycare. He has spent one full morning there so far, and he did great. Our provider told me he fit in well with the group of littles she already has attending, and there were only a few tears after I left, but he quickly stopped. He had fries for lunch that day, so he probably wishes he could live at daycare now, because I have never given him fries ;) I will admit, I did have the thought go through my mind of fitting a GoPro camera around his little head so I would not miss anything adorable that he does or says. But I thought it might come across a little weird and somewhat inappropriate so I let that thought pass :) 

 
Whatever days are left are filled with tying loose ends before I head back to work full-time. Today we purchased a mutual fund for Max. Our government will contribute a percentage for the purpose of your child's eduction into an RESP, so we jumped on that opportunity. Its scary to think how much post secondary education will cost when Max gets to that time in his life.  I also mailed off Max's birthday thank yous. After birthday invites, Christmas cards and birthday thank yous, I am looking forward to a hiatus in having to address envelopes. I am also looking in buying a return stamp to make my life easier. I should have done this ages ago.


I'm itching to get Max outside in the snow. My mom and dad bought him the cutest red sled for Christmas and we have yet to get him out in it. Today would have been the perfect day. The sun was shining, there was little wind, and it was not as freeze-your-butt-off-cold as it has been the last few days. But alas, Max has a nasty cough and a nose that is currently quite red from being wiped on average every five minutes. Today my husband and I went back and forth countless times about whose turn it was to wipe his nose, since we think that he hates us when we do it. He throws his head back and wails each time. Most times we settled on doing it together so he at least hates us evenly .. it was only fair ;)

Now that Max is one, I often find myself reminiscing on our first days home with him, as it was this time last year when we were brand new first-time parents. We handled diaper changes as a team and constantly worried about every odd noise he made while sleeping. It is crazy how last Wednesday I took Max to daycare for the first time, handing him over to someone I do not really know all that well yet, while that same day last year we brought him home from the hospital and we never took our eyes off him. It is bizarre how twelve short months later your life can change so much and look so different. At the same time though, it is exciting. My husband and I are very lucky to be where we are at in our lives, having the ability to have a family.


I will miss maternity leave so so so so much. It has been such a special time for me that I will never forget. I have made the most of my year off with Max. When I registered for an instagram account  the start of last year, I had written that I was going to document what I thought would be the best year of my life. Well I can now confirm, it has been the best year of my life. I love you Max :)

My instagram username is kimmieflo :)

~ K aka mama

Oh how time flies!!

Disclaimer- Pretty much all of the decorations I made for Max's birthday were ideas found from Pinterest that I straight up copied or altered slightly to my own taste. With that being said, I am not including the links to all of the blogs/websites were I found these ideas, because I had a file with clipped pictures that I used. If you type any of these ideas into Pinterest I am sure the original sites/blogs will appear. I hope it is okay and not offensive that I am doing this.

Max's 1st birthday party was a labour of love. I will be honest, I spent the last few months working on the decorations. I just kept seeing ideas on Pinterest that were too cute not to add :) I would chip away at them during nap time, but mostly after he had gone to bed. I think my husband was pretty sick of seeing my scissors and glue gun by the end of it all ;) 

I have often said during Max's first year that I cannot believe how quickly time passes when you have a little one, so when I saw this theme it was perfect for us :) I chose red and blue as the colour scheme.


The invitation I chose was a downloadable file from the Etsy shop, Posh Paper Parties. Here is the link to the shop.
https://www.etsy.com/shop/PoshPaperPartiesCo

When people entered the building where the party was held I had an easel outside the door so everyone would know what room we were in. On the easel was Max's one year 'stats' board outlining some personal details about him. I used various sized stencils and metallic markers for this project. There are so many different ways to create these boards.


The main table housed the thank you treats, the dessert and Max's birthday book. I had a friend of my mom's make special airplane cookies for our guests to take home. They were the yummiest short breads you've ever  tasted.. I think I am up to a six count of how many I have gobbled (there were some leftovers).


Using scrapbooking paper, stamps and card stock I made tags for the tops. I also had mum mums for the baby/toddler guests to take home. These were tied with ribbon and set in a vase on a bed of cotton balls aka clouds :) 

The theme of one of my baby showers when I was expecting Max was Build Baby M's library. So I thought it would be fitting to have a book everyone could sign as a way of remembering years from now, everyone who was with us on the day. As with most of my ideas, I found this on Pinterest.

 
I then purchased downloadable files for the cupcake toppers and wings from the super cute website http://ihearttoparty.com. They have lots of other themes as well! I used scrapbooking paper to make the cupcake liners that the cupcakes sat in. Here is the website I bought the files from. Very good deal! I printed them off on regular paper and them cut and pasted them to cardstock. Yes this took forever, but it was cheaper then taking the file to a printer. 

 
The backdrop I used was taken straight from Pinterest. I didn't change it at all because I loved it so much. I used the leftover canvas from the teepee I made Max to serve as a rustic table cloth for the main table. Don't you love when you can use materials you already have lying around?!!

For photos, I have taken monthly pictures of Max in the same chair, wearing a different "month tie" each month. You can find these sorts of stickers all over Etsy. Like any parent I have taken a gazillion pictures of my first born in his first year, so it was important for me to share with our friends and family some of my favourites. I saw the idea of collaging pictures into the shape of the number your child is turning and knew immediately that this would be part of the decor.


I rented a set of airplane to use as centerpieces for the table, as well as for the top of the cupcake display. I also found two antique suitcases and used these for the Flight School and for Max's thank you cookies. The idea for the other table centerpieces were also found on Pinterest. All materials for these four center pieces except for the straws were purchased from the dollar store; styrofoam balls, cotton balls, a pack of twelve jets, brown grass and four small planters. It was difficult to get the straw to stand up straight due to the heaviness of the ball, but it was stuck in a piece of styrofoam that was covered by the grass, and I just had to be really gentle when placing them on the table so they would stand up straight.


For Max's highchair area I found some really cute ideas on Pinterest. A sign that read "Max's Cockpit," and an airplane bunting for the front of his highchair tray. I used scrapbooking paper, felt and leftover string from my Christmas tags for these decorations. I used red streamers to make the space behind his chair a little more pleasing to the eye for the purpose of pictures, and I had a balloon bouquet beside him that consisted of a giant blue number one balloon paired with three red balloons. 


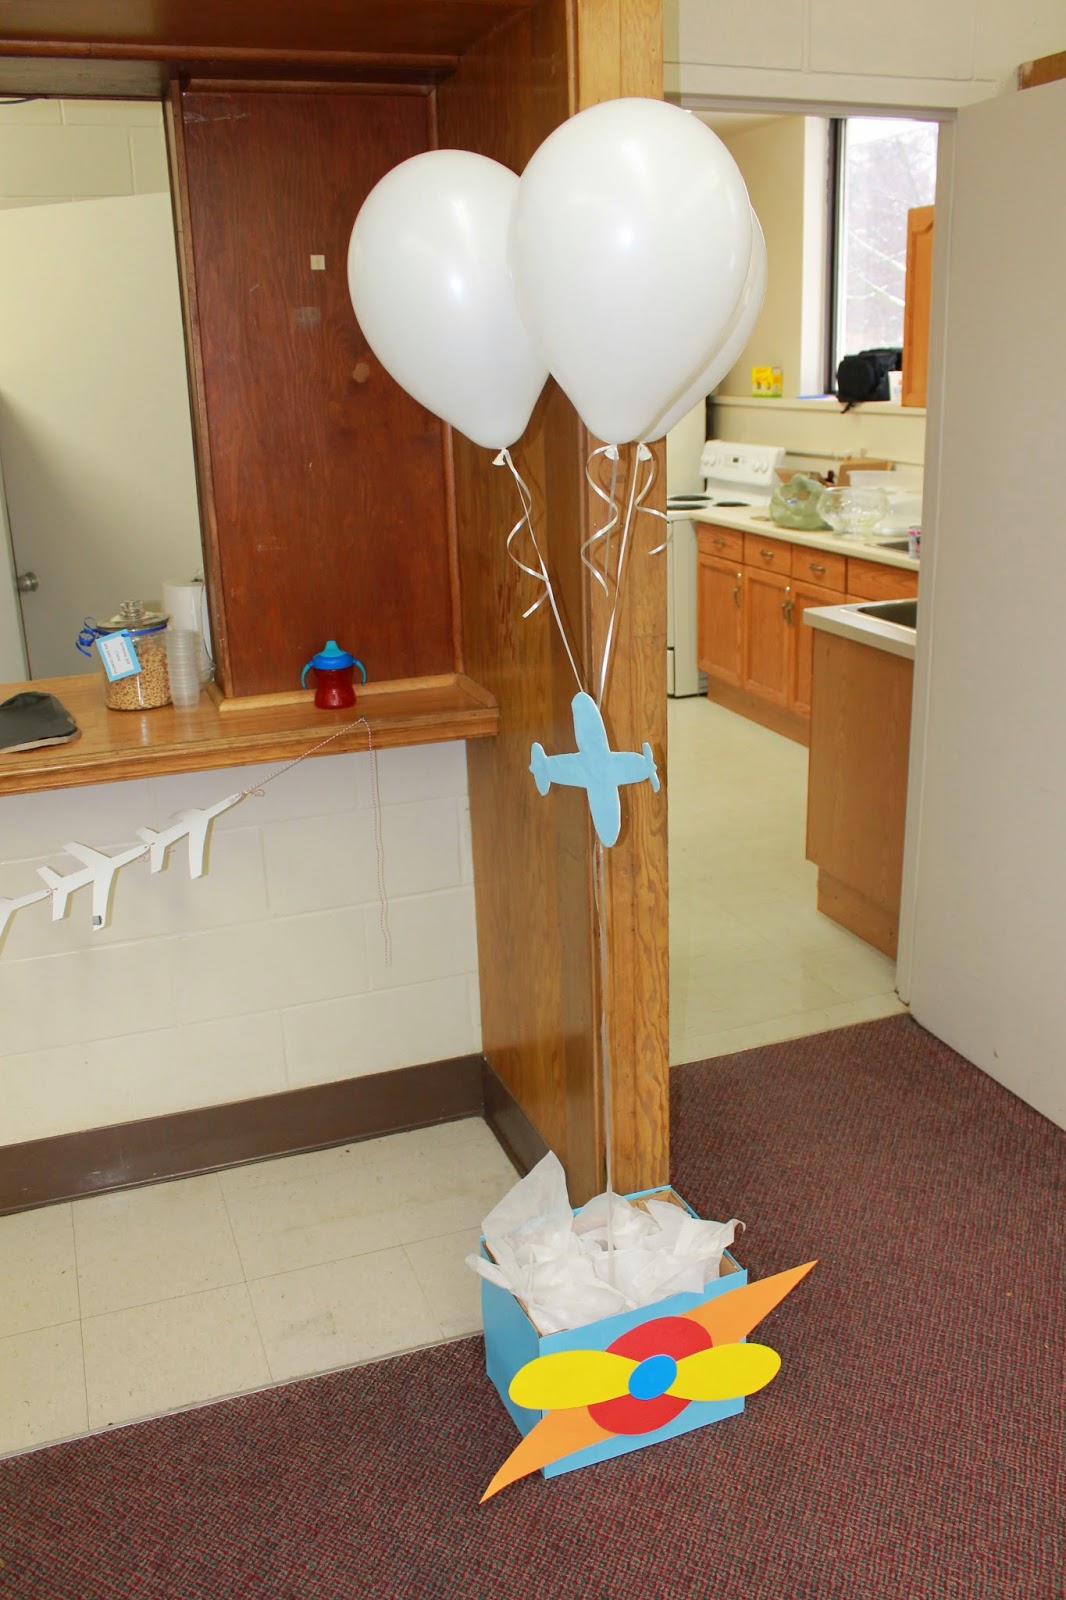
The other two balloon bouquets I had consisted of a grouping of three white balloons to look like clouds. A paper airplane was taped halfway down the ribbon, and they were both placed in festive airplane boxes.


For the pre-school aged boys that were invited I wanted to have a few activities they could do with their parents, since the toy area I blocked off was mostly toddler and baby focused. I decided on Pin the Propeller on the airplane, Flight School and birthday and airplane themed colouring sheets. Each child also got to pick out the letter sticker for the first initial of their name and stick it on a party hat. This is a cheap and easy extra to add to the party. The party hats came in bulk from the dollar store and I had the letter stickers lying around the house from a menu board I made (see my post on meal time organizing). 


Other details included all red and blue cutlery, napkins and plates. A jar of cheerios (aka Birthday Boy Chow) with a plastic scoop and cups for the babies and toddlers to snack on, festive straws, a blue dollar store tablecloth and decorative themed chalkboard for the present table, a "refueling station" sign where the food was located and finally one of my favourite decorations, an airplane banner made out of scrap booking paper. I was able to find cloud and airplane paper! These were from Hobby Lobby. They have a way better selection of paper then Micheals does, and it is cheaper.


 I made a cake stand for his smash cake out of a plate and candle holder from the dollar store. I then made a little bunting for his cake as well. This was also one of my favourite decorations.


The Birthday Boy had two outfits. I layered his outfit with a ONE onesie (from Old Navy) as an undershirt, so when it was time to eat his cake I just had to take off his dress shirt and tie. Very slick and it gave him a cute second look for pictures :) Max's moccasins were made by my dear friend who owns a company out of her home in Whitby, Ontario. Her business is called My Little Moccs. Here is her website.
http://mylittlemoccs.bigcartel.com/
Each pair is $40, and every so often she offers discounts.


Keeping in theme with the birthday, the time completely "flew by." But, it was such a great time and all the kids had fun, especially Max who just had fun walking all over the room with a big smile on his face. It was as though he knew it was his party.. too cute :) :) I am happy with what I did for his party. While he did not get much out of the theme and decorations, I love detail and if I can bring a smile to my guests face as they enjoy my decor and presentation, I have met my goal :) .. and I hope Max looks back on these pictures when he is older and smiles/shakes his head at his mama :) This party was about celebrating the amazing first year of Max being in our lives. But oh, how time flies!!

~ K


Wednesday 7 January 2015

Birthday boy traditions

Yesterday was Max's first birthday. My husband had a day off work so our little family was able to be together to celebrate. Since his birthday party was last weekend we decided to have a low-key day at home. The weather was bitter cold which was very fitting, considering Max was born in last year's polar vortex; one of the coldest day of the year. It was my hope that we would break out his new red sled he was given from his grandparents for Christmas, but it was way too cold to take him out. I still wanted to do something fun that I knew he would enjoy, so we took him swimming instead :)

 We started his birthday festivities after his morning nap. We look red and blue balloons, to match his birthday party decor of course ;) and filled his crib with them. I didn't know what his reaction would be, I thought he might be a little intimidated and just sit there, but boy did he surprise me. He was hitting those balloons all over the place. They were flying up in the air and flowing over the rails of his crib. I'm happy I got it on video to be able to relive that adorable moment for years to come.


I then made Pillsberry crescent rolls with chocolate chips inside. 

http://sallysbakingaddiction.com/2014/08/28/20-minute-chocolate-croissants/

Max really hasn't had chocolate before, but there's no rules on your birthday ;) He loved it, and kept coming back for more bites. I made my husband and I hot chocolate with marshmallows; a favorite of mine. I decided that I will make this a tradition every year for Max since he is a winter baby. This year it was just my husband and I drinking hot chocolate but next year Max will be able to join us in the fun. 


After we had our midmorning treat Max opened his presents. Wow, this little boy is very loved and a little spoiled so say the least.  He has many new toys and books that he will have fun discovering over the next year. 

In the afternoon we went swimming at a nearby community center. The pool was warm and there were only a few other people there, who Max of course waved at. We had so much fun. There were lots of laughs and smiles shared as we played with balls, he went down the kiddie slide and he floated on a flutter board. I thought he would sleep on the way home for his afternoon nap, but no luck. He was still ready to party. Our final birthday celebration was after dinner. We lit a candle and gave Max one of the cupcakes from his birthday party. He then opened our gift which was a set of Melissa and Doug cardboard blocks. 


The wrap job on the gift was looking pretty horrendous by the end. He had been walking by the present and tearing pieces of the paper off for the last couple days and I had to keep re-taping it back together. We both wrote special birthday messages to Max in his card. I wrote mine after I put him to bed the night before his birthday, so you can imagine it's pretty sappy and filled with emotion. But that's okay because I want him to know when he is older how I was feeling in my life at that moment.

And so begins our two new birthday traditions with Max. Filling his bedroom with balloons and having a special hot chocolate drink. There are so many fabulous and fun ideas out there nowadays, it is so simple to add a couple of little unique moments that will make your child feel special on their birthday.

With Max's birthday being over, I now move on to my next event. I am scheming up a poker night for my husband's 30th birthday. Of course it won't be as Pinterest inspired as Max's birthday party, since the party will consist of men only, but I'll manage to find a few ways to make it look man-approved fabulous ;) 

A post about Max's birthday party will be posted in the next few days. I hope everyone is having a good week, and for my fellow Ontarians, stay warm!!! Brrr!

~ K

Sunday 4 January 2015

DIY teepee!!

 Before I was even expecting Max I fell in love with the canvas teepees that you can see floating around Pinterest. I had visions of reading books with my little ones and playing imaginatively while being enclosed in our own special space. So needless to say, I could not wait to make one for Max, and our future kiddio(s). Since Max absolutely loves books (they are probably his most favourite thing) I thought he would enjoy having a special space in our living room to look through them. I also did this because our main floor is not entirely baby proof, so this way he has a safe spot to have fun.

This is the teepee I made for Max. I must say, I'm pretty darn proud of myself for taking this on.  Our living room does not always look like this. This was Christmas morning for Max. You see, the teepee was actually from Santa. Along with a popper, a new table and chair set and a Melissa and Doug construction puzzle.


There are so many different ways to make one. You can use different materials for the frame, you can sew your cover, or in my case if you are not a sewer, you can hot glue gun the hell out of it :) For mine, I used six, 1x2x8 pieces of spruce from home depot. Many people use pine, but spruce was cheaper and the sweet older man helping me told me it would not make a difference if I used the cheaper wood. I then had him cut a foot off each piece. You can leave the wood the full eight feet, but I choose to cut some height off because I did not want the teepee to be super tall. I then bought a 9x12 tarp, also from home depot and a spool of twine. 

Now comes time for the most challenging part. Which wasn't really crazy challenging at all. You drill a hole in each piece of wood about a foot down. You then feed the twine through each piece of wood. I had my dad who was down visiting help me shape how I wanted the frame to look. It is best to have an extra set of hands for this part. I pretty much put even spacing between all six pieces, except for the space I would be using as the door. I left the space between those two pieces larger.

side note- You have to build the teepee on carpet. When I brought the frame to a space that had hardwood flooring, prior to securing the tarp, the frame slid outwards. Carpet holds the frame in the shape you want, while you secure the tarp. After it is secure you can transfer it to a space that has hardwood flooring.

I then draped the tarp around the teepee. With the ends being at the opening of the teepee, I used two finishing nails to secure the tarp in place at the top of the teepee. The first cut I made was around the bottom, cutting off all of the access. The twelve feet was not enough to cover the last two sections of the frame beside the openings, so I used some extra fabric I had from Max's nursery curtains, to secure two side panels on either side of the doorway. I hope you can see what I mean by looking at the picture of the finished product. This worked out for the best, because it gave the teepee a pop of colour.

I then used many many large glue sticks, to hot glue the canvas onto the wood frame. I started at the back and glued from the top down, pushing hard on the fabric and holding my hand over top of the each freshly glued section to ensure the canvas would stick. Since the canvas has some weight to it, it would slide down a bit if it was not held in place. I made sure while gluing that the fabric between sections was pulled tight, so I would not have loose fabric closing in on the inside of the teepee.  I wanted the teepee to be taut, not billowy. When I glued the fabric to the canvas I folded a seam over  so the seam showing would not be frayed. I was unsure how this would look with using hot glue, if the glue would show, but it didn't and the transition from canvas to fabric is really nice and clean looking.

Since the canvas was long enough to wrap around the top section, but not the bottom section, the canvas comes up on an angle. You can see by the picture that this worked out to my advantage as when I fold it back it gives the appearance of door flaps!!

The top of the teepee was not very pleasing to the eye, so I found a scrap of fabric in the shape of a bandana and I tied this around the top. Some people glue a ribbon with a feather attached to it, hanging down from the opening. I opted out of this, since my cat thinks that every cave-like space in the home is his, and I did not want to give him any more reason to own this space ;)

With the leftover fabric I cut out out individual shapes and glued them on the back of the teepee just for added effect.

And there you have it!!! A teepee built for a Max :) :) I was cliche and bought the $16 faux sheepskin rug that everybody buys from Ikea for their teepee. I couldn't help it though, it makes the space soooo cozy :) I then grabbed one of the million baskets we have in the house and loaded it up with some of Max's favourite books, and a sock puppet for some extra teepee giggles.

This project looks challenging, but I promise it isn't. From start to end it only took about 1.5 hours, and the beauty of it is there is not one specific way to make it. So have fun with it and make it your own! 

As an extra, these are Max's favourite books.


He loves to empty the box and then flip through each one. I had to crease all of of the books since they are small for his hands. This way he can flip the pages easier. His favourite is the 'S' book because it has a snowman on the last page, and for some reason snowmen make this kid grin from ear to ear. It's pretty adorable. He is also in love with 'Pajama Time' by Sandra Boynton, and 'Tickle' by Leslie Patricelli . She also has the Christmas book 'Fa la la' which he loved flipping through during the holidays. I think it is because he relates to the main character in those books ;)

Happy teepee building! If you use this tutorial I would love to see your finished product!!

~ K